01
Set up the target
Use even lighting on the target and avoid glare or hard shadows. The target must sit firmly with little vibration – otherwise the camera image drifts and detection suffers.
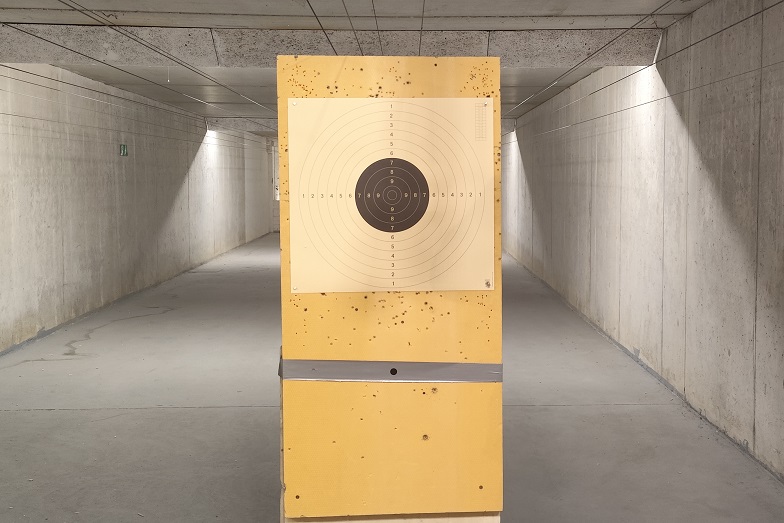
Step by step to live shooting – for all three methods: phone on the spotting scope, USB/UVC scope camera, or a fixed Wi-Fi camera beside the target.
There are three ways to get the target image. Pick your setup and the guide will show exactly the steps that apply to you. Which one suits your discipline depends on the distance: the spotting scope up to 25 metres, the Wi-Fi camera from 50 metres on.
Use even lighting on the target and avoid glare or hard shadows. The target must sit firmly with little vibration – otherwise the camera image drifts and detection suffers.
Use a stable tripod and place the scope so that vibration on the line stays as low as possible. Aim the scope at the centre of the target’s bullseye.
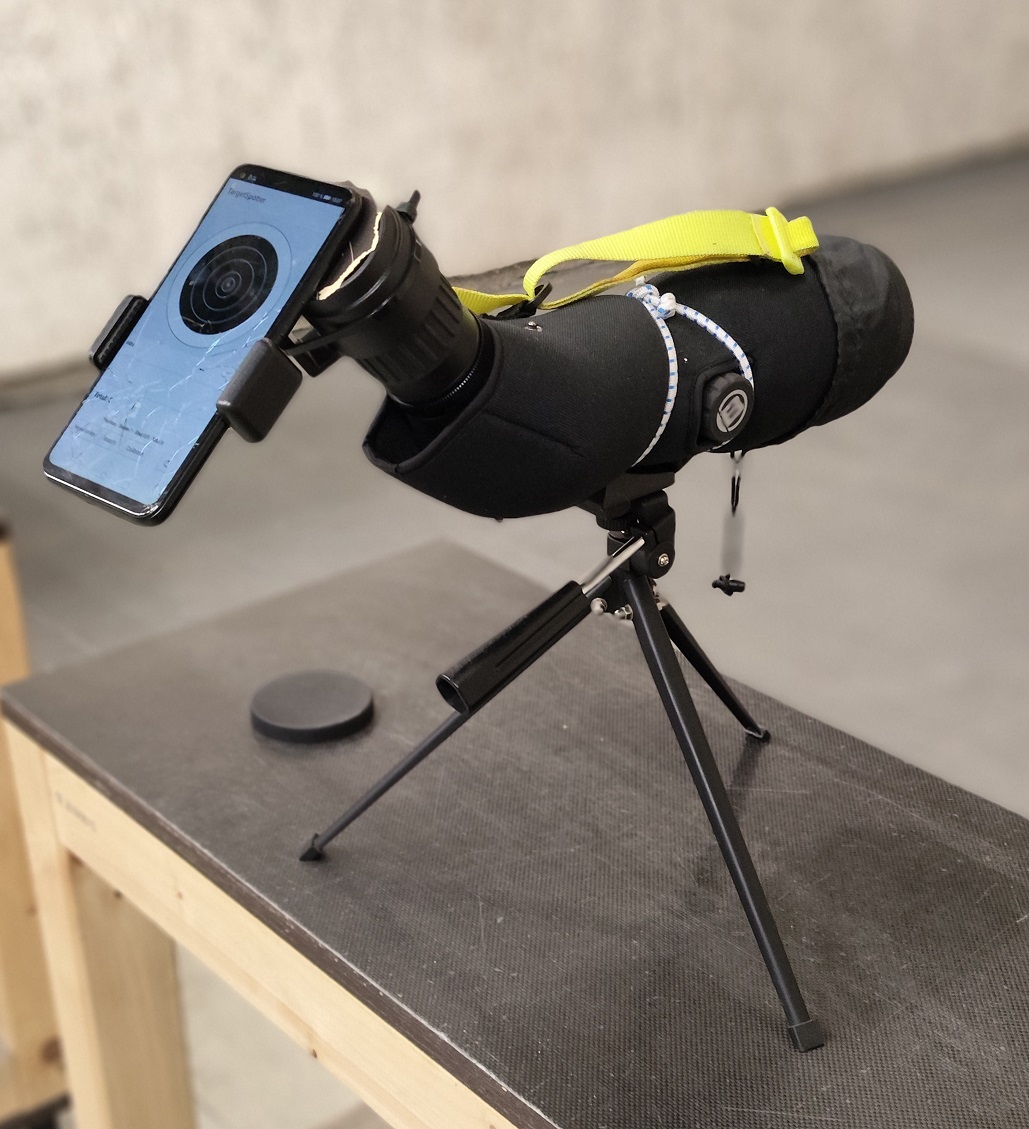
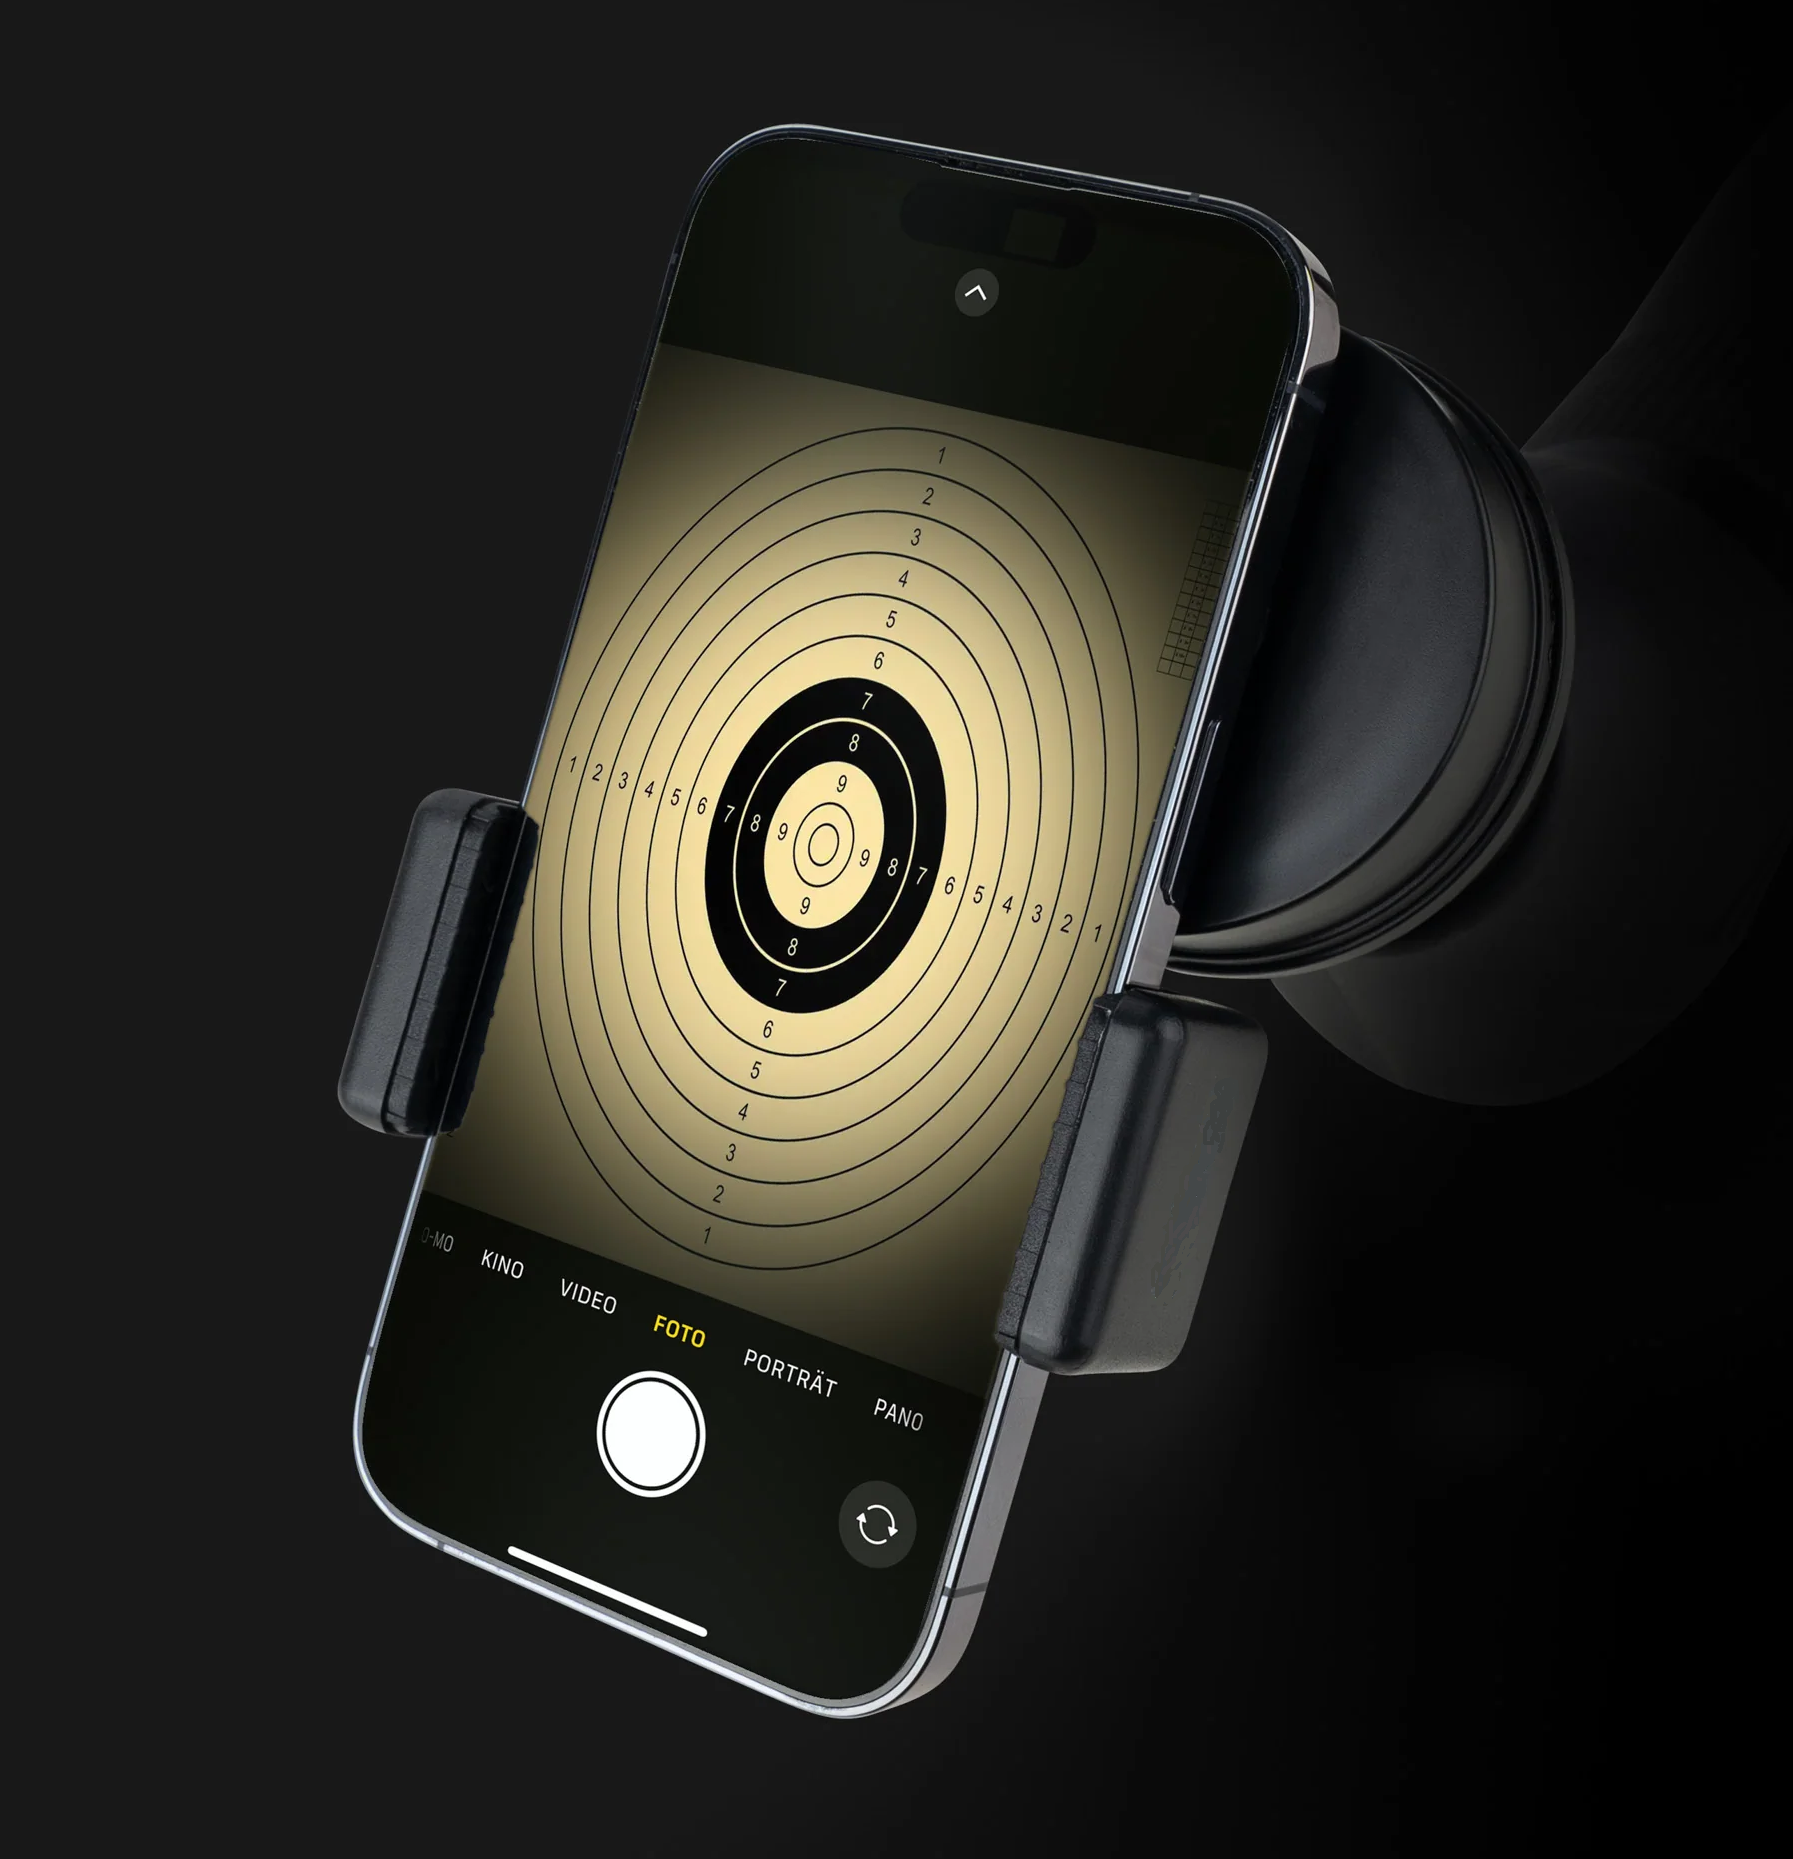
Use a stable holder on the eyepiece. Avoid light leaks between eyepiece and camera. Use the camera app to check the viewfinder image: set the camera to a 1:1 aspect ratio with no digital zoom. The main camera must look straight through the scope.
Open the app and choose the discipline you want.
Select target type and caliber. Acoustic shot detection is optional. The free version offers the 25 m precision target and the 10 m air pistol target.
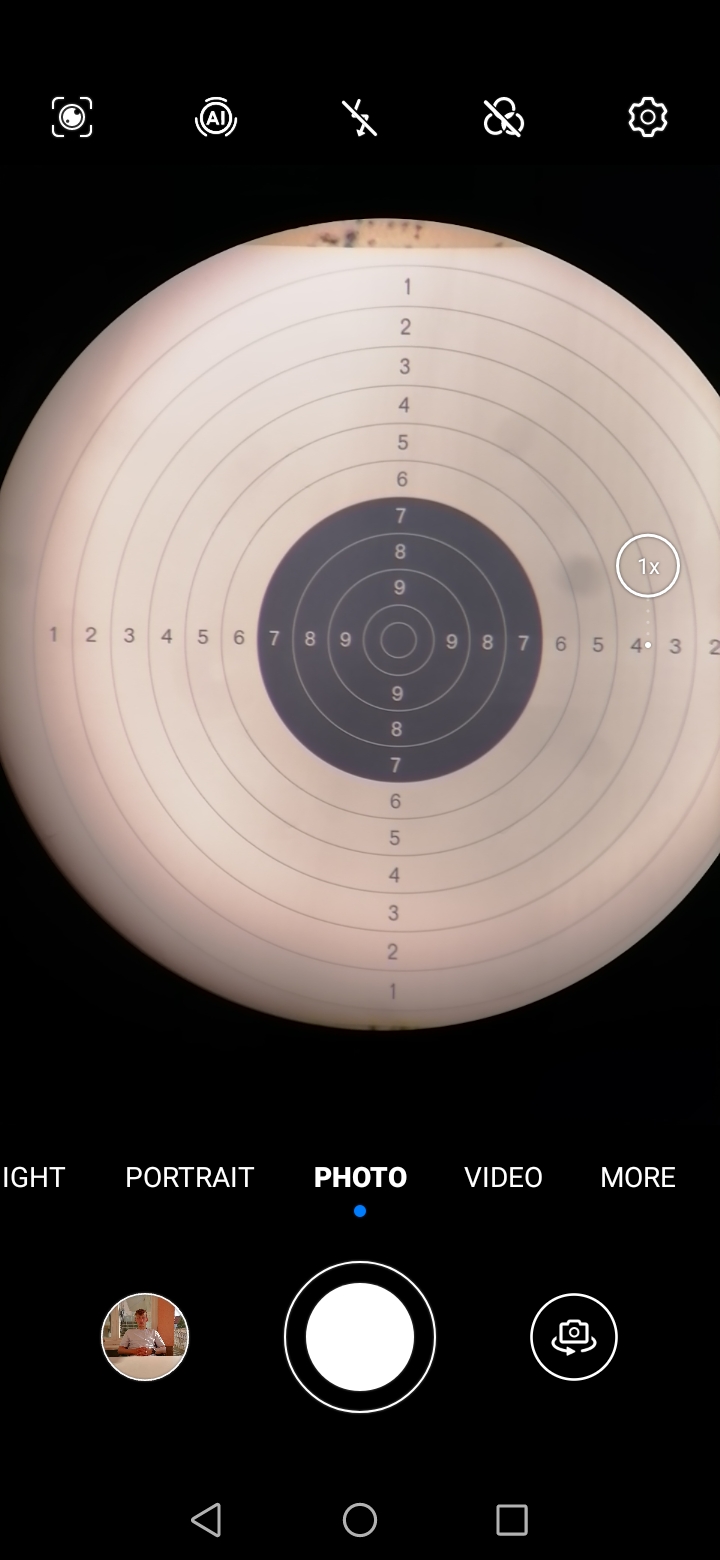
Calibration is the critical step: the app finds the centre and the rings. Align phone and scope so the target is in the camera image, then tap “Calibrate”.
The target, or its mirror, should sit in the centre of the image. For the “25 m precision” and “10 m air pistol” targets, rings 5 to 6 should still be fully visible; for “25 m rapid fire”, the white horizontal bars up to ring 7. TIP: you can try calibration without a scope to get a feel for the viewfinder image required. Just step in front of the target with your smartphone and find the optimal framing for a successful calibration.
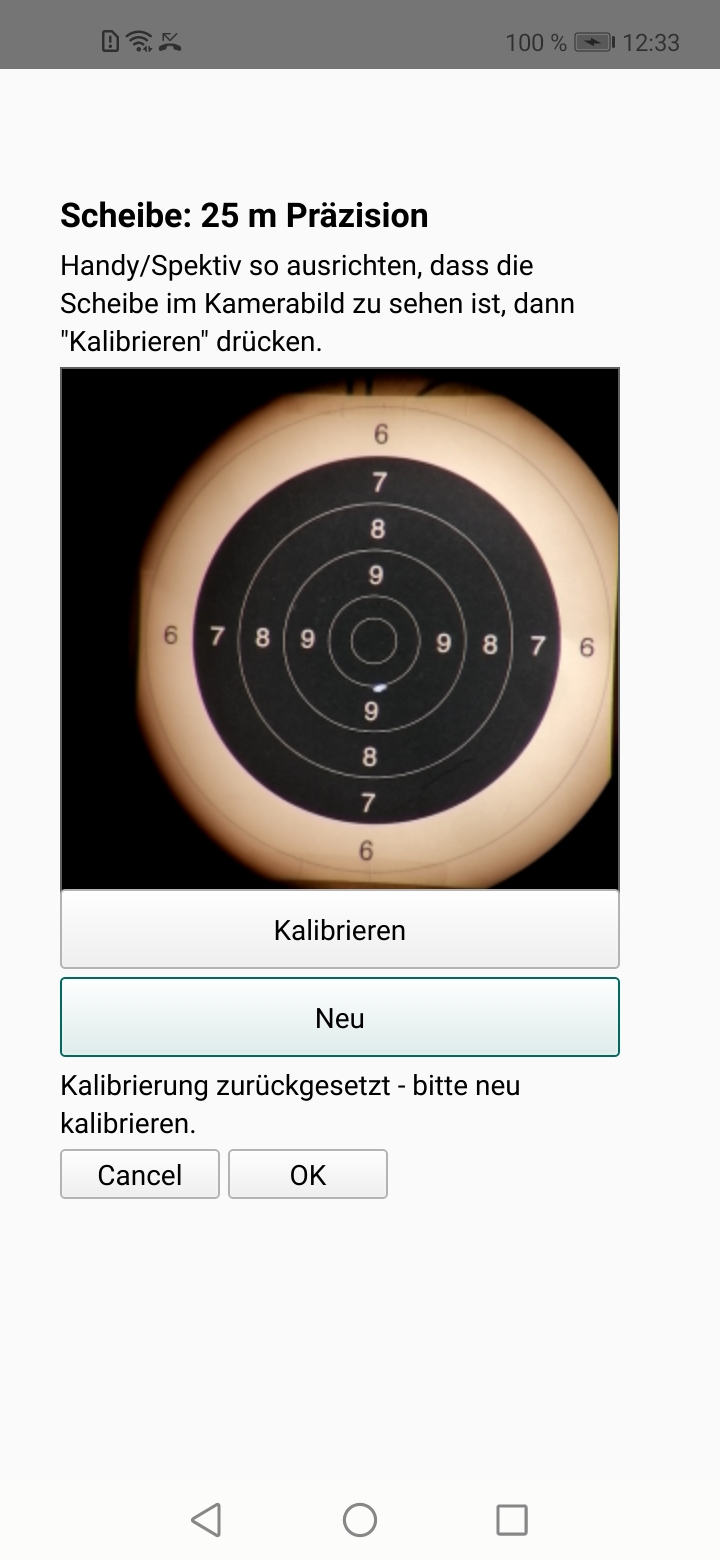
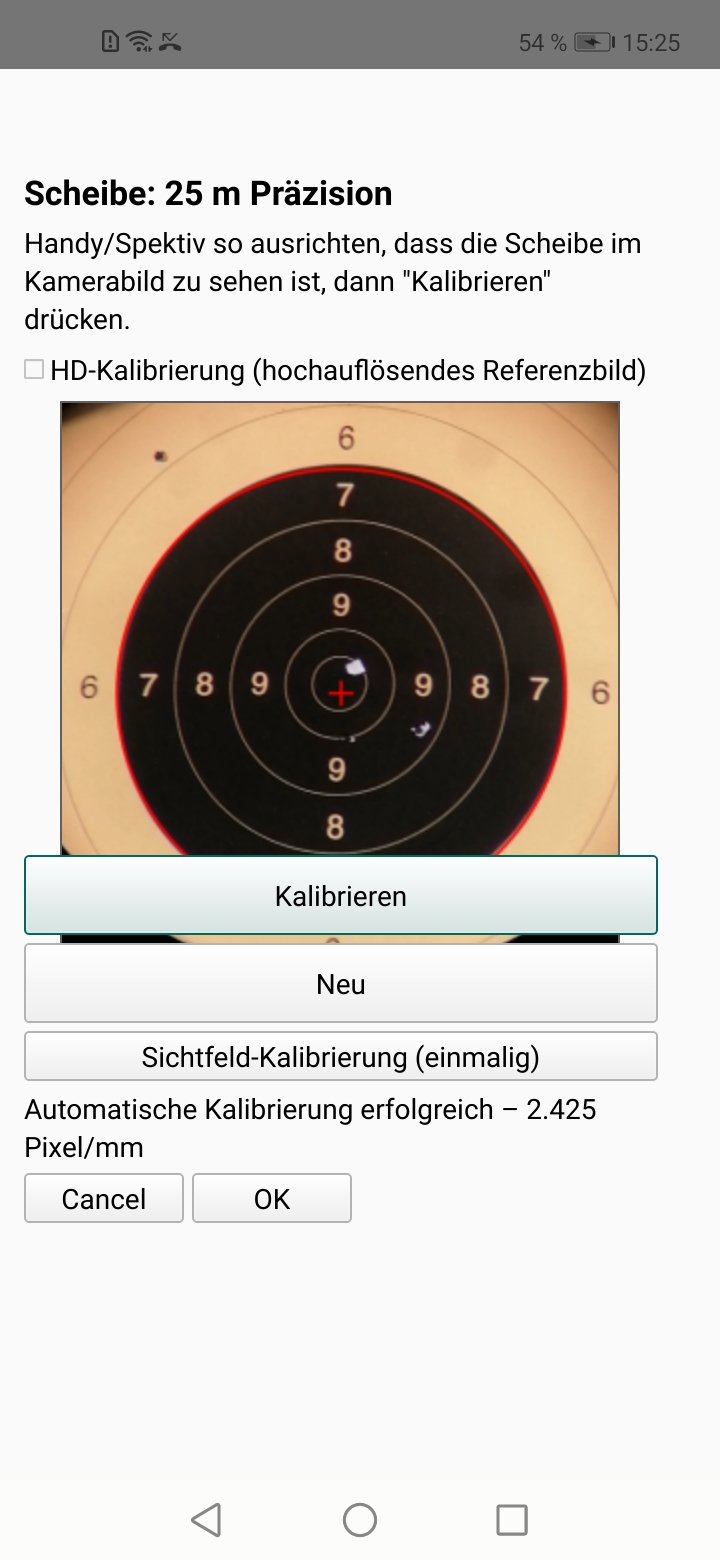
A successful calibration is shown by a red ring and a red cross sitting exactly over the mirror. If they are not plausible, tap NEW within 4 s and repeat the calibration. If they are OK, the program continues automatically.
If the program cannot find any features, a black and white image is shown. In that case too, tap NEW and repeat the calibration.
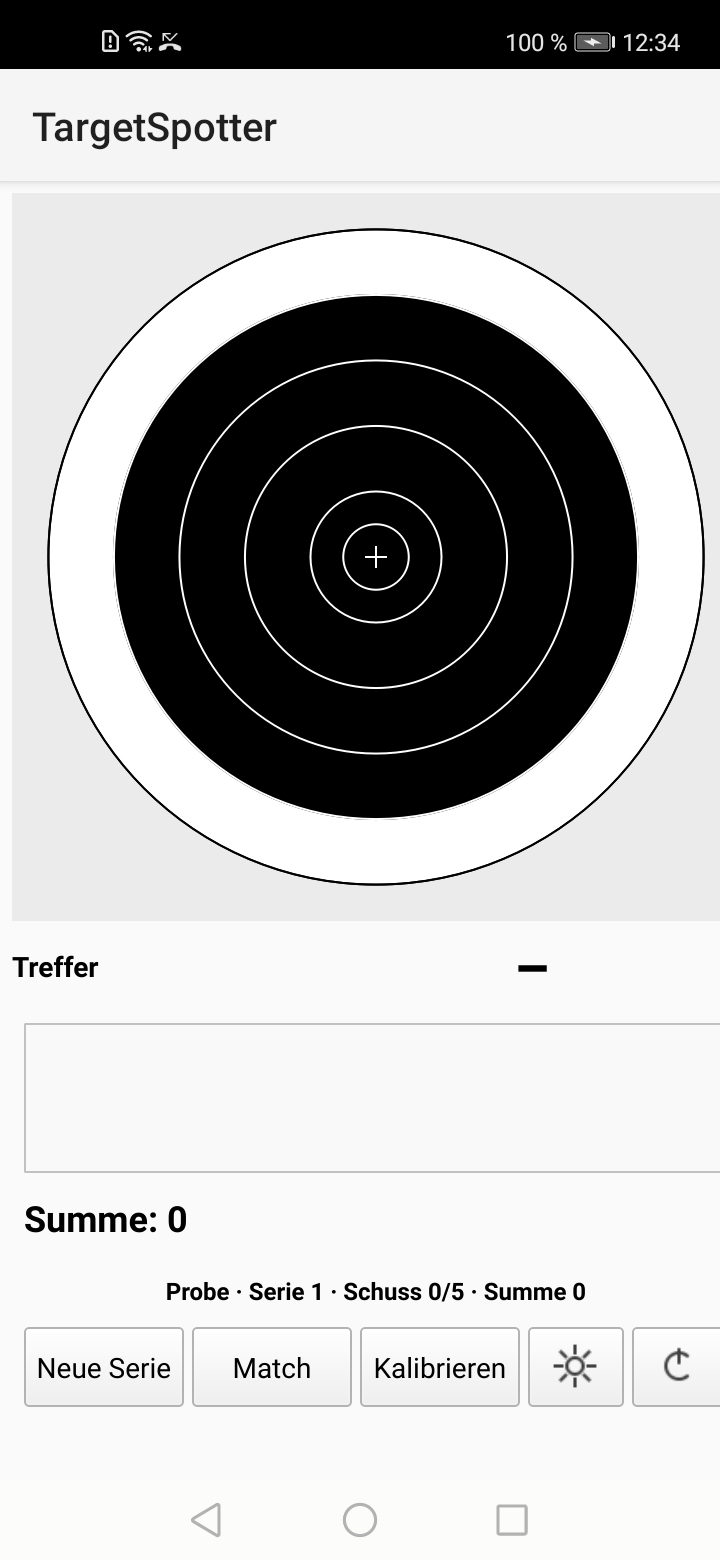
The app detects shots by sound and by image. Shot-sound detection needs microphone access. Each hit appears in real time on the virtual target and in the hit list.
Camera quality, lighting and vibration can cause errors. Wrong hits cannot be ruled out entirely, especially in difficult conditions (outdoors etc.). A simple swipe across the display shows the target itself at any time (real target).
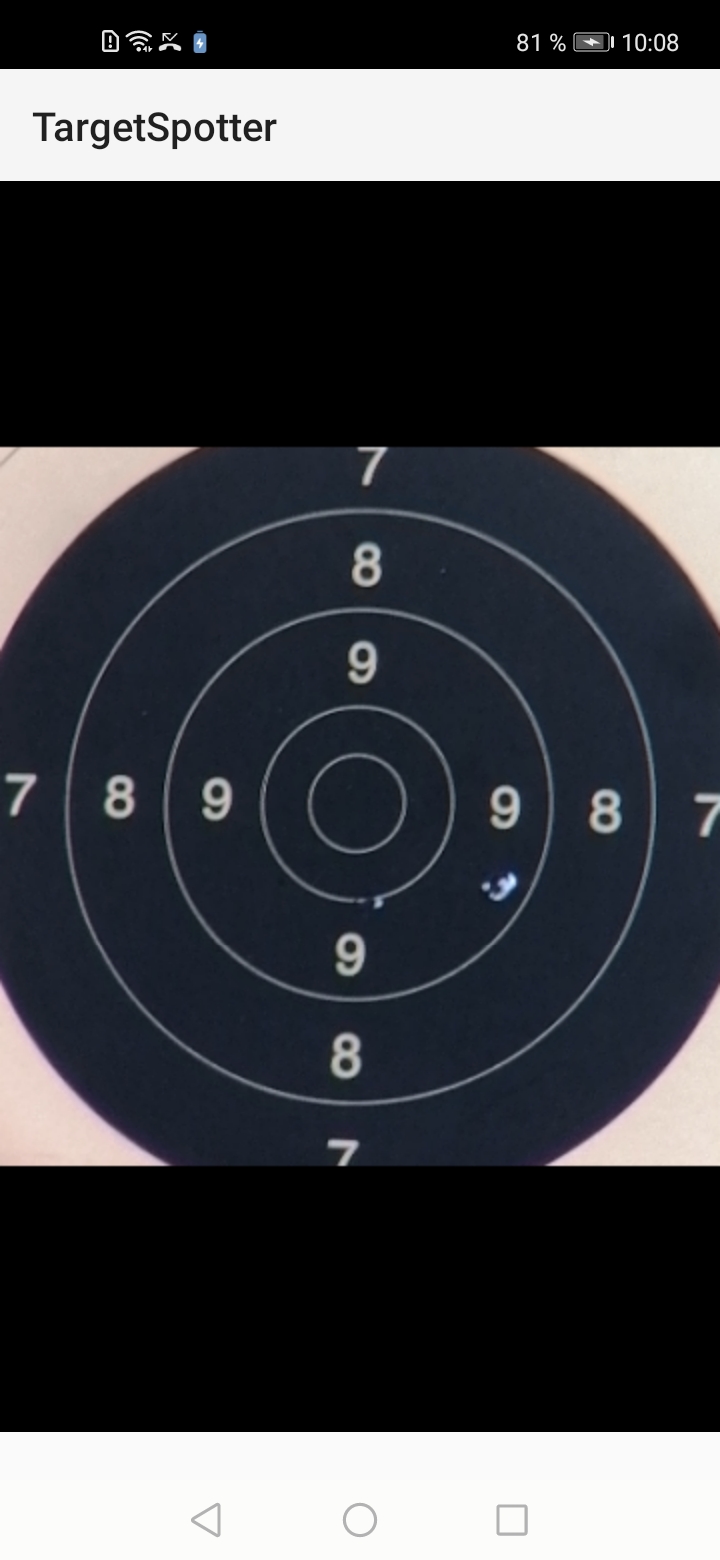
If the algorithm cannot detect a hit, the last camera image is shown for 6 seconds.
The duel program follows ISSF timing: 7 seconds hidden, 3 seconds visible, repeated five times. The app scores the series automatically once it is finished. For that, the target must be visible again no later than 3 seconds after it last turns away. Hits not detected during the duel series are marked with a question mark in the hit list.
Avoid touching the smartphone while you shoot – any contact moves the scope and the camera image.
Use even lighting on the target and avoid glare or hard shadows. The target must sit firmly with little vibration – otherwise the camera image drifts and detection suffers.
Use a stable tripod and place the scope so that vibration on the line stays as low as possible. Aim the scope at the centre of the target’s bullseye.
The USB/UVC camera is fitted onto the eyepiece of the spotting scope and fixed firmly in place. It has to sit on axis, otherwise the target image is tilted or vignettes at the edges.
Connect camera and phone with a USB-C cable. As soon as the camera is plugged in, TargetSpotter starts automatically. The USB camera is recognised as the image source on its own – there is nothing to select. The phone stays free to move and can lie ready on the shooting bench.
Use a cable long enough for your bench, and keep an eye on the battery – the phone powers the camera as well.
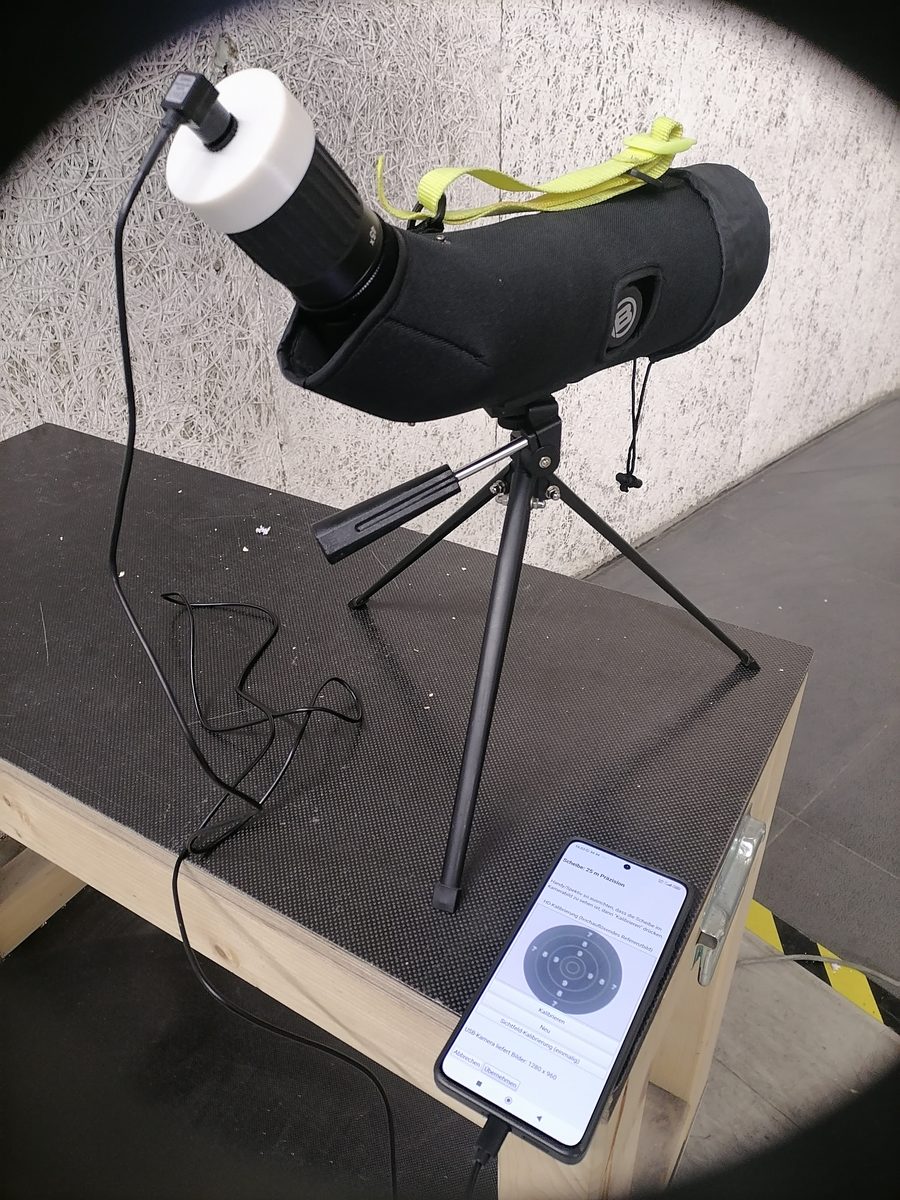
The easiest way to check focus, zoom factor and the alignment of the spotting scope is the free MScopes app. It shows the USB camera image directly, so you can set focus and framing calmly before starting TargetSpotter.
Open the app and choose the discipline you want.
Select target type and caliber. Acoustic shot detection is optional. The free version offers the 25 m precision target and the 10 m air pistol target.
Calibration is the critical step: the app finds the centre and the rings. Align phone and scope so the target is in the camera image, then tap “Calibrate”.
The target, or its mirror, should sit in the centre of the image. For the “25 m precision” and “10 m air pistol” targets, rings 5 to 6 should still be fully visible; for “25 m rapid fire”, the white horizontal bars up to ring 7. TIP: you can try calibration without a scope to get a feel for the viewfinder image required. Just step in front of the target with your smartphone and find the optimal framing for a successful calibration.
A successful calibration is shown by a red ring and a red cross sitting exactly over the mirror. If they are not plausible, tap NEW within 4 s and repeat the calibration. If they are OK, the program continues automatically.
If the program cannot find any features, a black and white image is shown. In that case too, tap NEW and repeat the calibration.
The app detects shots by sound and by image. Shot-sound detection needs microphone access. Each hit appears in real time on the virtual target and in the hit list.
Camera quality, lighting and vibration can cause errors. Wrong hits cannot be ruled out entirely, especially in difficult conditions (outdoors etc.). A simple swipe across the display shows the target itself at any time (real target).
If the algorithm cannot detect a hit, the last camera image is shown for 6 seconds.
The duel program follows ISSF timing: 7 seconds hidden, 3 seconds visible, repeated five times. The app scores the series automatically once it is finished. For that, the target must be visible again no later than 3 seconds after it last turns away. Hits not detected during the duel series are marked with a question mark in the hit list.
You can pick the phone up, it is only on the cable. Do not touch the scope or the camera, though – any knock shifts the target image.
Use even lighting on the target and avoid glare or hard shadows. The target must sit firmly with little vibration – otherwise the camera image drifts and detection suffers.
The pre-configured Wi-Fi camera is placed above, beside or in front of the target, at a distance of 2 to 3 metres. Set focus and zoom so that the largest target you want to cover fills the frame.
Get the camera from tec-hro.de
Once the camera is running, connect the phone to its Wi-Fi. At this address you can call up a current camera image at any time to check the alignment or adjust it:
http://192.168.60.43:8080/snapshot.jpg
This method needs no spotting scope.
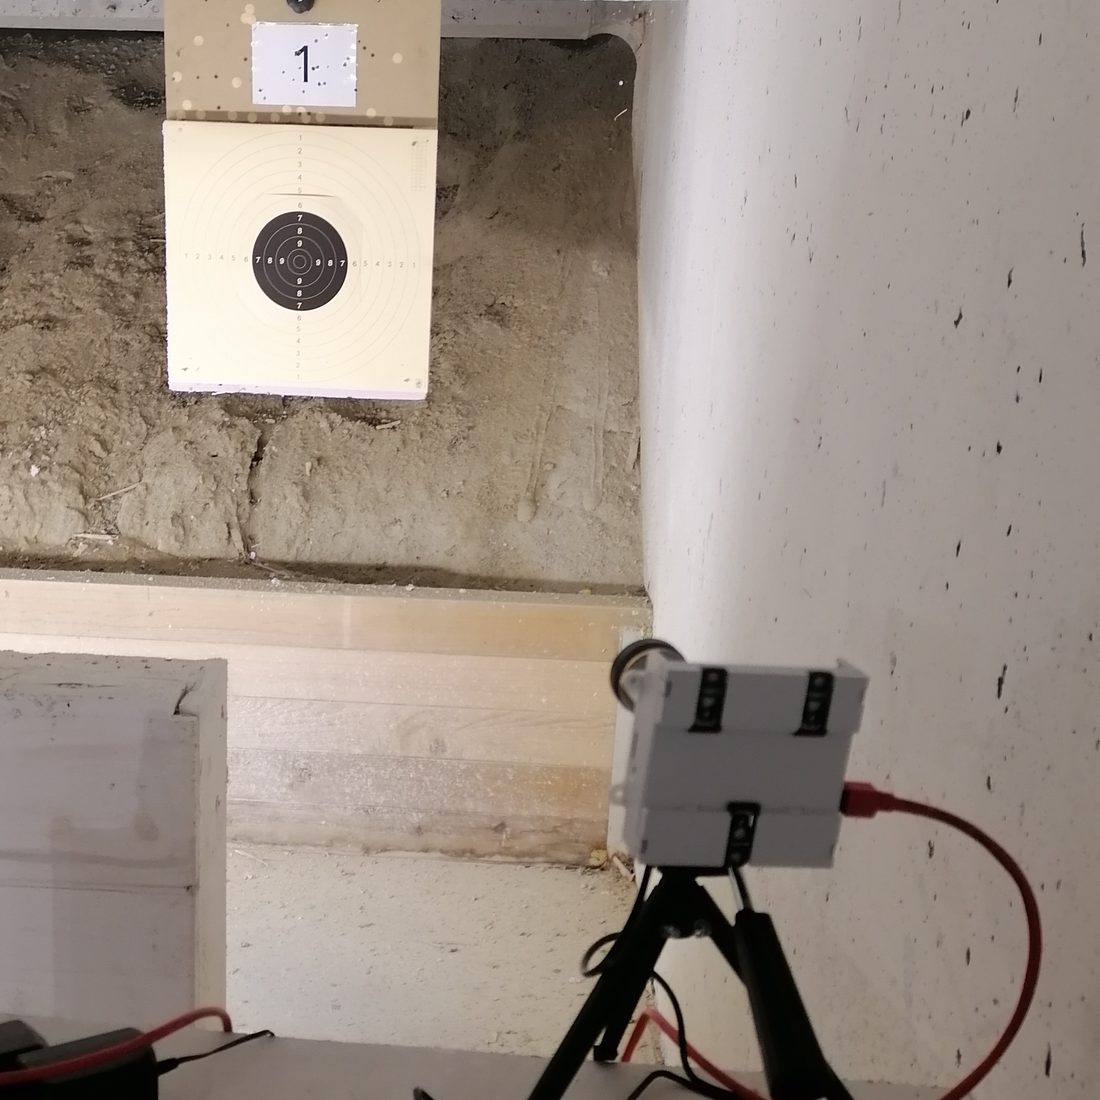
Open the app and choose the discipline you want.
When the app starts, it detects the connected Wi-Fi and selects the camera as the image source automatically.
Select target type and caliber. Acoustic shot detection is optional. The free version offers the 25 m precision target and the 10 m air pistol target.
Calibration is the critical step: the app finds the centre and the rings. Align phone and scope so the target is in the camera image, then tap “Calibrate”.
Framing, focus and zoom were already set when you positioned the camera – here you calibrate directly on the camera image.
The target, or its mirror, should sit in the centre of the image. For the “25 m precision” and “10 m air pistol” targets, rings 5 to 6 should still be fully visible; for “25 m rapid fire”, the white horizontal bars up to ring 7. TIP: you can try calibration without a scope to get a feel for the viewfinder image required. Just step in front of the target with your smartphone and find the optimal framing for a successful calibration.
A successful calibration is shown by a red ring and a red cross sitting exactly over the mirror. If they are not plausible, tap NEW within 4 s and repeat the calibration. If they are OK, the program continues automatically.
If the program cannot find any features, a black and white image is shown. In that case too, tap NEW and repeat the calibration.
The app detects shots by sound and by image. Shot-sound detection needs microphone access. Each hit appears in real time on the virtual target and in the hit list.
Camera quality, lighting and vibration can cause errors. Wrong hits cannot be ruled out entirely, especially in difficult conditions (outdoors etc.). A simple swipe across the display shows the target itself at any time (real target).
If the algorithm cannot detect a hit, the last camera image is shown for 6 seconds.
The duel program follows ISSF timing: 7 seconds hidden, 3 seconds visible, repeated five times. The app scores the series automatically once it is finished. For that, the target must be visible again no later than 3 seconds after it last turns away. Hits not detected during the duel series are marked with a question mark in the hit list.
The camera has to stay still – do not readjust it after calibrating. The phone, on the other hand, you can move and pick up freely.